
This detailed guide explains how to set up a proxy on Wi-Fi networks for iPhone users. A proxy is an important tool that provides users with anonymity and access control by routing internet traffic through a server. The guide includes step-by-step processes for logging into Wi-Fi settings, accessing the network you are connected to, and configuring proxy settings.
The guide explains in detail how to enter the IP address and port number of the proxy server, and how to specify the username and password when necessary.
This guide is a basic guide to help users understand how to customize internet access using a proxy on their iPhone. You can make your internet experience even more secure and personalized with effective proxy settings.
You can install it by following the steps:
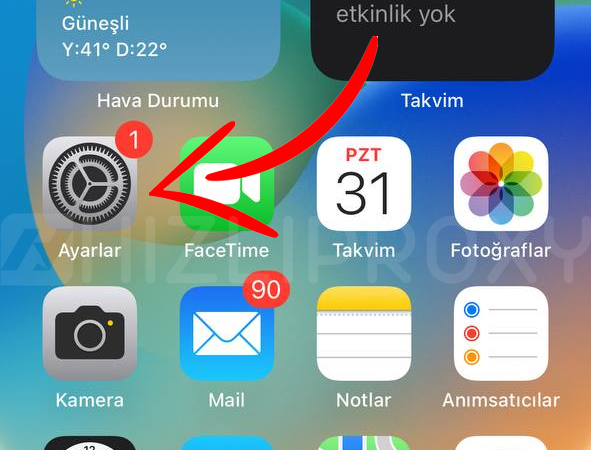
Step 1: Login to Wi-Fi Settings
-
From your iPhone's home screen, find and open the "Settings" app.
-
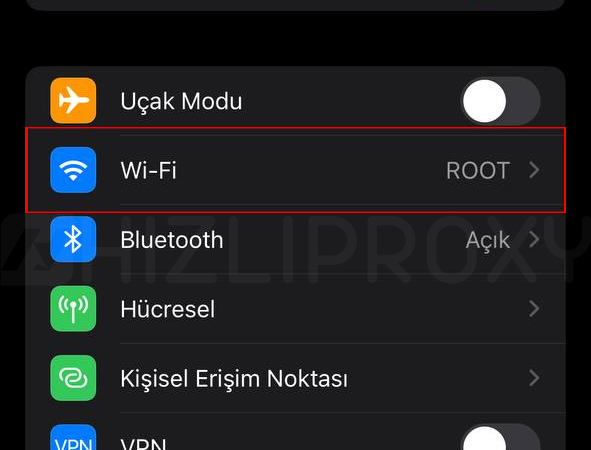
Tap "Wi-Fi". A list of Wi-Fi networks will appear.

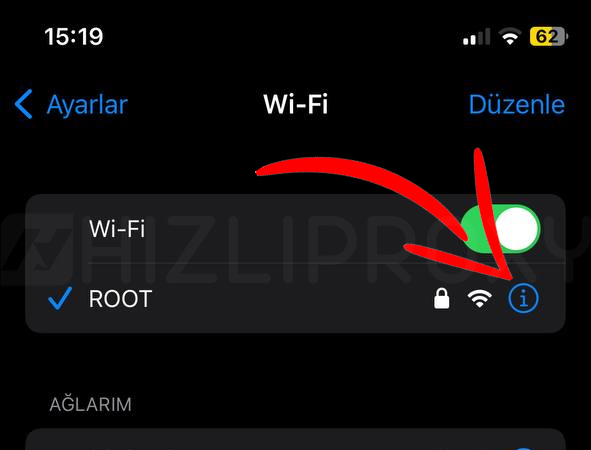
Step 2: Login to the Wi-Fi Network You're Connected to
-
Tap the Wi-Fi network you're connected to. (Unconnected networks, which are gray, can be easily distinguished from connected networks, which are light.)
-
You will see a blue letter "i" icon next to the network. Tap this icon.
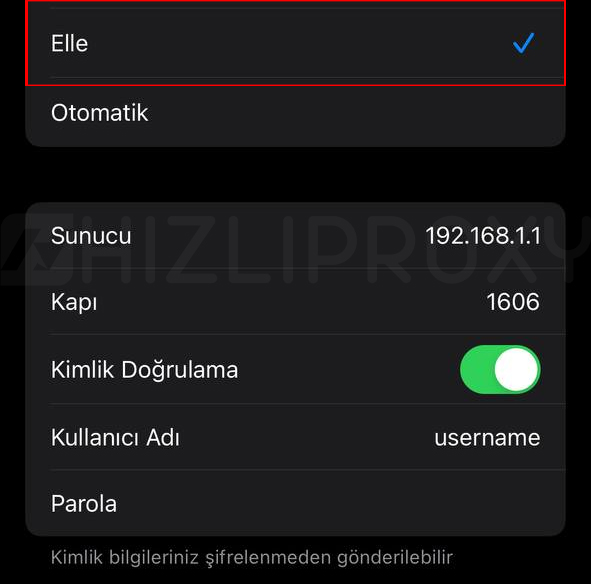
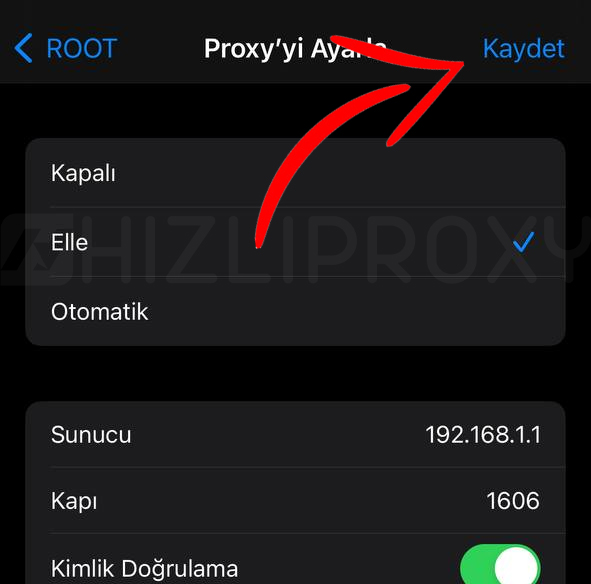
Step 3: Configure Proxy Settings
-
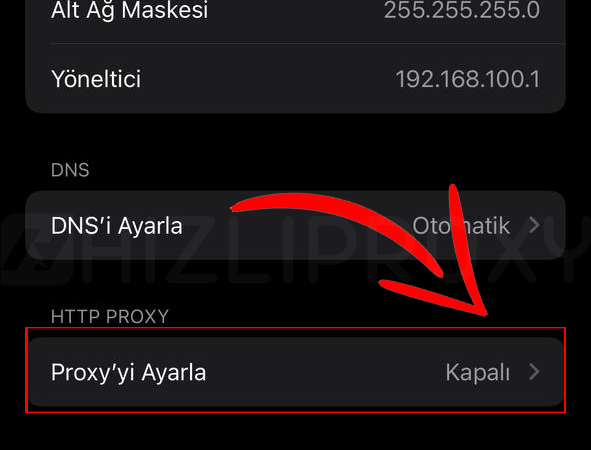
On the "Network Settings" page that opens, the details of your network will appear. At the bottom of the page, under the headings "HTTP PROXY" and "HTTPS PROXY" it will say "Closed".
-
Select "Manual" instead of "Automatic" next to "HTTP PROXY" or "HTTPS PROXY".
-
Now, you will need to enter the IP address and port of the Proxy server. You can obtain this information from your proxy provider or network administrator.
-
Enter the IP address of the proxy server in the "Server" text.
-
In the "Port" text, enter the port number of the proxy used.
-
If proxy username and password are required, also fill in the "Username" and "Password" options. (Leave blank if these are not required.)
-
Select the "Authentication" option if you are using one. This option is required to connect to the proxy server with username and password.

Step 4: Save Settings
- Once you've made sure you've entered your proxy settings correctly, tap the "Save" button at the top of the screen.
Now your proxy is enabled and your iPhone will access the internet via proxy over the Wi-Fi network you are connected to.
Please note: Using a proxy may compromise your security and privacy as it will redirect your internet traffic to the proxy server. Be careful not to use proxy servers that you do not trust or know.
This guide should help you understand and enable proxy usage on your iPhone.
Note that iOS will not allow you to set up a SOCKS5 proxy server via settings. This only works for HTTP(S) proxies.